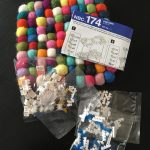
If you read my recent post all about my birthday, you will know that my very, very best friend Katie (don’t forget to check out her blog here) got me some OUTSTANDING birthday gifts. One of which was a Nano Blocks set! I felt compelled to make it and then write about it! Read on to find out what I thought!
Nanoblock first appeared in 2008, created by a toy company called Kawada Co. Ltd. They are not disimiliar to Lego bricks but are much smaller in scale. Apparently, what makes them very different to Lego bricks is that the underside of the Nanoblock has a dividing “flange” (oh my God, I have just laughed for a solid 10 minutes at the word flange). There are 11 different Nano block types (thanks Wiki!).
You can buy Nanoblock sets from a few different places, most toy shops, Amazon and WH Smith, amongst others.
The set that Katie got for me was a Unicorn.

So at the weekend, I thought I’d break open this tiny packet and give it a go. Neil got a set for Christmas – it was a Pacman and he’d got a little cross during the making process and it was nearly launched out of mum’s back window. I figured as I had more patience and slightly slimmer fingers I’d crack it no problem.
Inside the little bag were 4 separate little bags and the instructions, I proceeded to rip the bags open and dump the contents onto the table (pro-tip: try not to launch the said contents across the room, these bricks are tiny..).
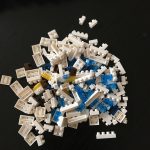
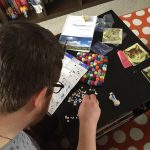
Once I’d collected up the bricks that flew across the room, I set about following the instructions to create my very own unicorn. Did I mention the bricks are tiny? Because they are tiny.
I got off to a pretty good start, you build from the bottom up, so the first layer is not fixed to anything and it was quite tricky to get the second layer on and my big chubby fingers kept skewing the bricks across the table. Once I’d got the second layer on it became a bit easier.
The instructions are set out in steps, each step tells you how many of each brick you will need for that step and then each step is shown in one of those working drawing type things – which I found a little tricky to follow.

It was going pretty well, I’d gotten to step 5, I’d only dropped a few bricks on the floor and then it started to go a bit wrong.
I started to ask myself after the 7th attempt at putting the neck and head together, why did Katie hate me? Why was she punishing me? WHAT HAD I DONE TO DESERVE THIS?!
At this point, almost in tears of sheer frustration at my inability to attach one stupid tiny (I don’t know if I mentioned how tiny they are..) brick to another, I shouted to my bearded superhero to assist me.

A cup of tea and some Neil intervention, I manged to move past the most stressful 30 minutes of my life and of course Katie didn’t hate me. I moved on to the blue mane of my little unicorn – easy. I finished the head, popped on its unicorn horn and managed to move onto the second to last step.
At this point, you to flip it over to attach it’s legs.

Easy peasy. Once it’s little legs were on, I flipped him back over for the last step – attaching the tail. There was one sticky moment where the unicorn’s horn fell off and I nearly flung it through the window but I popped it back on and made the tail.
I stood back to admire the finished product.
I love it, its cute and looks exactly like a little pixelated unicorn. Fabulous!

Look at him! He’s so tiny and adorable. Totally unaware of the grey hair’s he’d caused.
All in all, I had fun making this (for the most part). I found the instructions a little difficult to follow, especially as I’ve only ever put together Lego sets, where the instructions are much more step-by-step!
The little bricks are well made and to be fair, the instructions do suggest you use a special base and Nanoblock tweasers, which I imagine would have made things easier.
Once put together, it’s pretty solid and I’m not worried about it breaking if I dropped it. I imagine the bricks would hurt way less than Lego bricks if you stood on them too!
Finally, I’d like to say a huge great big thank you to Katie for including this little guy in my gifts. I love it and I love her. Also, shout out to Neil who practically saved my life during the build process!
Have you built a Nanoblock set? Was it easy? Would you give one a go? Let me know below!
I really enjoyed reading this! It had me giggling all the way through 🙂
WOW, those blocks really are tiny! I’m so clumsy and not the best with doing delicate things so I’d definitely suck at putting one of these together 😀
Omg it’s so adorable! I love it’s little blue mane and tail <3 what a lovely present!
They were so tiny! It was a little bit stressful lol but he looks pretty good on my shelf! Xx