Today I’ve been playing with the curse of many a parents life – Hama Beads. I can remember having these when I was younger. My mum can also remember finding them on the floor weeks after I’d played with them.
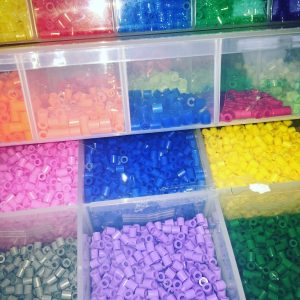
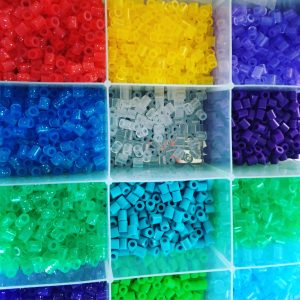
I have purchased a couple of Hama bead sets and beads over the years. Earlier this year I sorted them all into boxes by their colour (You should know that I am still finding “lost” beads on the floor 6 months on). You can get yourself a set from the toy shop The Entertainer
Usually you can buy sets of beads on their own, sets that include instructions, beads and the peg boards and just the boards themselves.
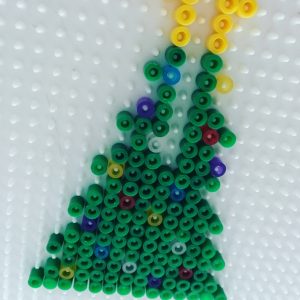
So, if you have some Hama Beads lying around your house or if you go out and buy some, here is an easy Christmas decoration you can make. I’ve made a colour coded pattern that you can follow or you can just follow the picture which is pretty easy too.
You will need:
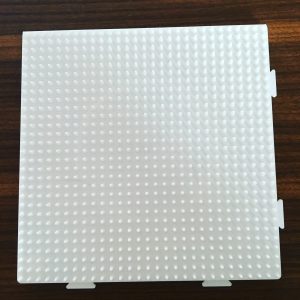
- A square or rectangle peg board
- Selection of Hama Beads, I used yellow, green and some different coloured glitter beads too.
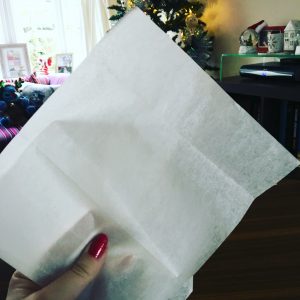
- Tracing paper or greaseproof paper (a sheet of this will often come in a Hama Beads set or you can also buy it seperately).
- A hot iron
- Some string (optional as this will stand freely or can be hung on your tree)
This is the pattern should you wish to follow it:

Start putting the beads onto the board. It is best to do this on a flat and steady surface free from paws. Also, learn from my mistakes by not blue-tacking the board to the table and upending all the beads when you come to move it and find it is now wierdly welded to the table.
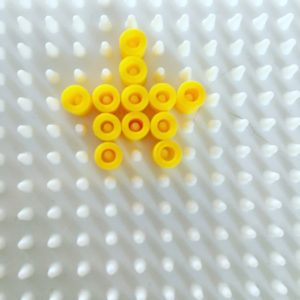

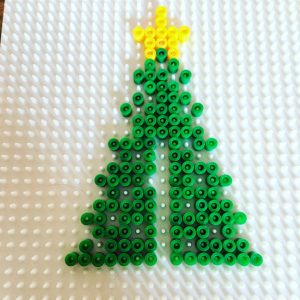
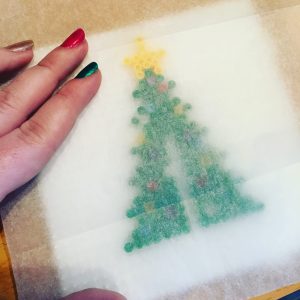
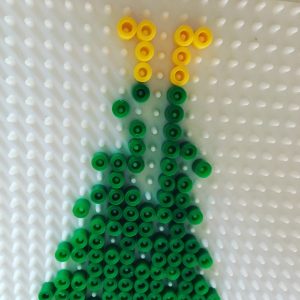
I like to do one colour at a time. I did the yellow star first, then the green for the tree. You will notice that I have left a gap through the centre. The two halves can then be slotted together to make a 3d structure!
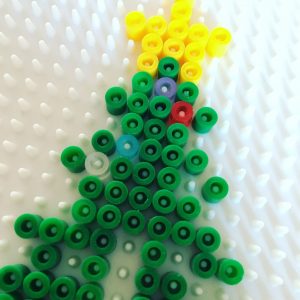
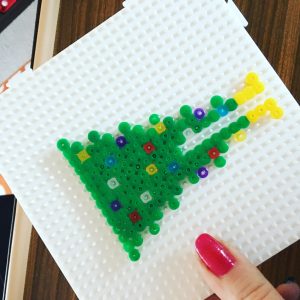
I then used some translucent glitter beads for the baubles. Once you are happy with the placement, carefully transport the board with the beads on to wherever you keep the iron. I took ours into the kitchen and used the sideboard.
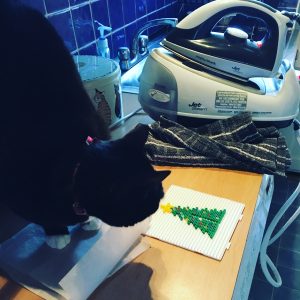
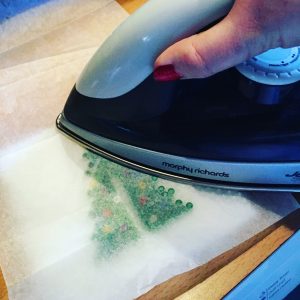
Move the cat out of harms way, lay your sheet of tracing paper carefully over the board. Once the iron is hot carefully iron over the design on the board. If you have a nicer work-surface than me then pop a tea towel underneath the board to protect your surfaces.
The beads will start to melt together and stick slightly to the tracing paper. You can see this happening so can peel the tracing paper back slightly to see if the beads have melted together.

Once you are happy with the amount of melting. Turn off the iron, wait a few minutes for the paper to cool and carefully peel the paper back.

Once cooled completely, it should come off the board easily, leave it to one side.
Repeat the whole process for the next pattern.
Once both parts are completed and cooled:

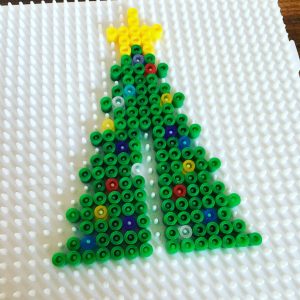
Slot them together and ta-da you will have a fabulous little 3d Christmas tree.
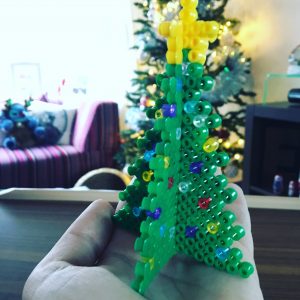
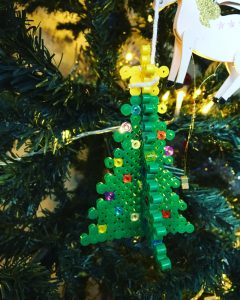
I popped a piece of string around the top of mine to hang it on my Christmas tree. You can easily scale this tree up to make it slightly bigger or slightly smaller should you wish.
What do you think? Would you give this a go?
These are so cool 🙂 I’m gonna have a go at making these next Christmas! I loved hama beads when I was a kid. I also use to love chewing the beads apparently too 😀 I’d love to have a go at making some Pokemon ones. I’ve definitely tempted to go and buy some hama beads after reading your post.
I used to chew the beads too!! If you look on Pinterest there are some fab patterns for Pokemon! Xx